Pages

Thursday, 29 November 2012

Lentil Soup a la Moosewood

Lentil Soup drizzled with vinegar

If you've never read The Moosewood Cookbook, you are missing a wonderful experience. Mollie Katzen wrote the original in 1977 and the The New Moosewood Cookbook in 2000. It remains one of the top ten best-selling cookbooks of all time. And with good reason: it's a great cookbook. The recipes are vegetarian and most use ingredients you are probably familiar with. The book itself is a joy to read with each recipe handwritten and illustrated by the author. If you want to know more about Mollie Katzen, visit molliekatzen.com for the full story, her Tweets and, of course, more recipes.

If you've never tried lentil soup, you are missing another wonderful experience. I make it using the recipe in The New Moosewood Cookbook with a few minor tweaks. It's easy and relatively quick to prepare (you can use any lentils, but red lentils cook fastest), fat-free, warming and fills you up in the gentlest way.

MA's Lentil Soup a la Moosewood

Simple ingredients
3 cups dry lentils 
7 cups water
2 tsp salt
3 tsp minced garlic
2 cups chopped onion
2 stalks celery, chopped
2 medium carrots, sliced or diced
1 tsp dried basil
½ tsp dried thyme
½ tsp dried oregano
freshly ground pepper
red wine vinegar or sherry vinegar, to drizzle on top

Place lentils, water, and salt in large soup pot. Bring to a boil, then lower heat to the slowest possible simmer, and cook, partially covered, for 20 to 30 minutes.

Also yummy without the vinegar drizzle
Add vegetables, herbs and pepper. Partially cover and let simmer another 20 to 30 minutes, stirring occasionally. 

Serve hot, with a drizzle of vinegar on top of each bowlful. (Mollie Katzen's recipe also includes topping each bowl with some skinned, seeded, chopped tomatoes, but I never seem to have them when I make this soup, so I can't tell you how it tastes. If you try it, let me know.)

Makes 6 to 8 servings.


Tuesday, 27 November 2012

Not Le Menu Chicken Parmigiana

Oh so good!

My daughters and I seem to talk about food a lot. I was talking about chicken parmigiana with one of my girls the other day and she reminded me about Le Menu Chicken Parmigiana. Le Menu was a microwavable tv dinner back in the eighties. In those days, I worked full time outside the home (too bad blogging wasn't around then) plus having all the usual responsibilities and commitments of a husband, children, pets and community. You get the picture. I rushed around a lot to stay on top of it all. Being a true eighty's lady, I had no qualms about feeding my family from the frozen food aisle when time was short and schedules were crazy. Le Menu Chicken Parmigiana frozen dinner with its tasty chicken breast smothered in tomato sauce and cheese, fettucine alfredo and Italian green beans was popular at our house. My daughter also reminded me how great the reusable Le Menu plates with their microwave covers were, too. We had those around long after Swanson's stopped making Le Menu.

That's enough reminiscing for the moment, but now you know how this recipe got its name.

Chicken Parmigiana does take a little time to prepare. I find it is always worth the effort. There are many recipes for it out there. This one takes you step-by-step through how I do it. I like to serve it with a pasta and steamed green beans. Here's to you Le Menu!

MA's Chicken Parmigiana

Preheat oven to 350°.

Pound chicken to flatten slightly
4 skinless, boneless chicken breasts
¼ cup flour
1 egg
1 tsp water
1 cup dry, unseasoned bread crumbs
1 tbsp each minced fresh parsley, basil and oregano or 1 tsp each crumbled dried parsley, basil and oregano
salt and pepper to taste
1/3 cup olive oil
2 ½ cups tomato sauce, homemade or your favourite from a jar or tin
6 to 8 ounces Mozzarella cheese, thinly sliced
½ cup grated Parmesan cheese


MA's Tip: Homemade tomato sauce will always taste better than store-bought. But let's be realistic, there's not always time to make your own. I like to take the plainest store-bought sauce and add my own herbs and spices to it. It makes me feel better about using the store-bought stuff and I can customize the herbs and spices to suit the dish. In this dish, for instance, I would add parsley, basil and oregano. And, one more cooking confession ... when I don't have a chunk of Parmesan in the fridge, I use the pre-grated "sprinkle cheese" Parmesan. You know the kind. In fact, I used it to make the Chicken Parm you see here, and it tasted just great. Okay, back to the recipe.

Trim any fat from chicken breasts and, if desired, remove tendons. One at a time, place chicken breasts between sheets of waxed paper and pound gently with a mallet or a heavy, empty bottle. Pound until flattened slightly.
Line up for coating the chicken
In a shallow bowl or pie plate, place the flour. 

In a second shallow bowl or pie plate, combine egg and water.

In a third shallow bowl or pie plate, combine crumbs, herbs, salt and pepper.

In a large frying pan, heat up the oil over medium high heat.

One at a time, coat chicken breasts in flour, then dip into egg/water mix, then coat with crumb/herb mix.

Place breasts into frying pan and brown thoroughly, about 10 minutes per side.

Add Mozza and sauce (and Parm, of course)
Into a large baking dish, spoon about half the tomato sauce and spread evenly to cover the bottom of the dish. Place the chicken breasts on top of the sauce. Spoon remaining sauce over and around the chicken breasts. Top breasts with slices of Mozzarella and sprinkle evenly with Parmesan. 

Cover the baking dish with foil. Bake for 35 minutes. (If your chicken breasts are more than a half-inch thick, be sure to bake them a little longer to ensure they are cooked through.)

If you want, you can brown the top by removing the foil and putting the dish under the broiler until the cheese bubbles and browns.

Serve hot.

Makes 4 servings.

Printable Recipe for MA's Not Le Menu Chicken Parmigiana


Sunday, 25 November 2012

Pucker Up Blueberry Muffins


At first glance these little lovelies may look a little pale, even anemic, but don't be deceived: they pack a lemony punch deliciously punctuated with bursts of fresh blueberries. Almost cake-like in texture, these muffins border on being good for you. They are made with yogurt and are almost fat-free. Grab a lemon and give them a try.

MA's Lemon Blueberry Muffins


Preheat oven to 375° F.
Grease muffin tins or line with paper or parchment muffin liners.

MA's Tip: I bought some parchment muffin liners on a recent shopping trip. I tried them for the first time making this batch of muffins. I also made some of the muffins in regular paper muffin liners. The parchment liners are a winner! The muffins slipped right out of the parchment liners with none of the muffin stuck to the liner.

Ready to mix it up

1 ½ cups flour
¾ cup white sugar
1 tbsp baking powder
Zest of one lemon (about 2 tbsp)
¾ cup (6 oz basket) fresh blueberries
¾ cup plain fat-free yogurt
2 tbsp butter, melted
Juice of one lemon (about 5 tbsp)
1 egg

In a large bowl, mix together the flour, sugar and baking powder.
Ready for baking - parchment liners in foreground

Add lemon zest and blueberries to the dry ingredients.

In another bowl, mix together yogurt, butter, lemon juice and egg. Stir well.

Add wet ingredients to dry ingredients and stir until dry ingredients are moistened through out.

Fill muffin tins about 2/3 of the way.

Bake for 15 to 17 minutes. These muffins don’t brown much, if at all. I recommend using a cake tester or wooden skewer inserted into a muffin to be sure they’ve cooked through.

Makes 12 medium-sized muffins.

Printable Recipe for MA's Pucker Up Blueberry Muffins

Thursday, 22 November 2012

Rustic Beef Stew and Bannock


Rustic Beef Stew and Bannock

This is the kind of food that warms a cold winter day, which is a good thing because where I live we have about five straight months of those. The comfort from a bowl of steamy beef stew and a chunk of bannock is always welcome.

The stew itself is pretty straightforward. I call it rustic because I leave the veggies and meat in rather large pieces. If you want things to stew up a little faster, just dice things up into smaller pieces (not too small because the meat will shrink as it cooks). You may loose a little of the distinctive taste of each ingredient, but you will save some cooking time. You can change out the vegetables to suit your taste, just remember that the softer vegetables like mushrooms and peppers won't need to cook as long as the crunchier ones, unless you like them that way like I do.

A word about the beef .... right now the stores I shop in have some pretty high prices on pre-cut stewing beef. I guess it's due to the convenience of having someone do the chopping for you. If you don't want to pay extra for that, or you don't like the look of meat they've chosen or the size of the dice they've used, check out what beef is on sale. Almost any steak or roast can be cut up to make a stew. And it doesn't have to be a pricey cut, because it's going to cook a long time and be tasty and tender.

And about the dried herbs ... please note that I use the same combination and amount of herbs with the flour to season the meat as I do to flavour the sauce. So you will have to measure out the herb combination twice.

This recipe makes a lot of stew, about 8 good-sized servings. Rather than halfing the recipe, I suggest making it all and freezing what you don't want to eat right away.

Tuesday, 20 November 2012

Chewy Carrot Oatmeal Cookies

An easy to make drop cookie
When the cookie craving hit me, I headed for my little blue plastic recipe box and leafed through the Cookies section. I decided on this recipe for Carrot Oatmeal Cookies because I had all the ingredients on hand and I didn't really feel like looking any further. I have no idea where I originally got the recipe that I wrote on the card, but it does make some tasty cookies. And because they are drop cookies, aside from taking time to grate the carrot, they come together quickly.

Unfortunately, I forgot to photograph the finished cookies before they were eaten. What can I say? They were really good, and, in my defence, I did share.


MA’s Chewy Carrot Oatmeal Cookies


Preheat oven to 375° F.
Grease cookie sheet (s).

1 cup brown sugar, firmly packed
½ cup butter or margarine
2 eggs
½ cup milk
1 cup carrots, grated
1 ½ cups flour
1 tsp baking powder
½ tsp baking soda
½ tsp salt
½ tsp cinnamon
½ tsp nutmeg
2 cups quick-cooking oatmeal
1 ½ cups seedless raisins

MA’s Tip: To keep the raisins from drying out during cooking, plump them up before adding them to the recipe. Soak them in water for five to ten minutes; then drain them well in a colander. This is also a good time to pick through for any stems or woody bits that may have been packed with the fruit.

Cream together the sugar, butter and eggs.

Add milk and carrots to creamed mixture. Stir until well mixed.

Sift together flour, baking powder, baking soda, salt, cinnamon and nutmeg.

Add oatmeal and raisins to dry ingredients and stir until raisins are well coated with the flour mixture.

Add dry ingredient mixture to wet ingredients.

Drop by tablespoons onto cookie sheet.

Bake about 15 minutes or until cookies are lightly browned all over.

Makes 3 dozen cookies.


Sunday, 18 November 2012

Variable Vegetable Hotpot


Vegetable Hotpot served over quinoa


There are a lot of great recipes out there for vegetable hotpots. This one is inspired by British nutritional therapist Barbara Cousins in her book Vegetarian Cooking Without. Her recipes exclude ingredients such as gluten, dairy, sugar, yeast and saturated fat, which can be problematic for many people.

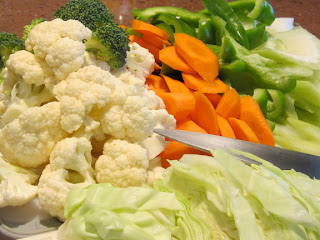
You can vary the vegetables you use in this recipe. What I used in the photos you see here are eggplant, zucchini, green pepper, onion, celery, carrot and broccoli. If you want more protein, substitute one of the vegetables with canned, drained chick peas. You can also change out the topping using steamed cauliflower instead of potatoes.

This is a delicious vegetarian meal with a savoury sauce. It takes some time to prepare and cook, but it's worth the effort. Try it over quinoa. Very satisfying! Very good for you!


MA’s Vegetable Hotpot


 Preheat oven to 400° F.

Veggies for my hotpot
4 or 5 good sized potatoes, peeled and diced into 1” cubes

3-4 lbs vegetables (about 8 to 10 cups), cut into even-sized chunks. Your choice in any combination could include onions, leeks, celery, carrots, parsnips, zucchini, eggplant, broccoli, cauliflower, sweet peppers, cabbage, mushrooms, green beans or any of your favourites.

5 tbsp olive oil, divided into 3 tbsp and 2 tbsp
4 cloves garlic, minced

1 tsp dried thyme
1 tsp dried rosemary
2 tsp paprika
2 tbsp dried parsley
1 bay leaf

1 tsp mustard powder
3 tbsp rice flour
1 tbsp tomato paste
2/3 cup cold water

2 cups vegetable stock
salt and pepper

Boil the potatoes about 15 minutes until they are cooked but not mushy. Drain and set aside to cool and dry.

In a large frying pan, heat the olive oil and garlic on medium high heat. Add the vegetables and cook about 10 minutes, stirring frequently. The vegetables should be a little soft but not overcooked.

Add the thyme, rosemary, paprika, parsley and the bay leaf to the vegetables. Mix well.

In a large bowl, mix together the mustard powder, rice flour, tomato paste and cold water until smooth. Add the vegetable stock and mix well. Pour the sauce mixture onto the vegetables and bring to the boil, stirring constantly. Season with salt and pepper.

Transfer vegetables to an ovenproof dish.

Toss cooled potatoes with 2 tbsp olive oil until well coated. Pile potatoes on top of the vegetables.

Bake for 45 minutes. For a crispier potato topping, place under the broiler for 5 minutes.

Printable Recipe for MA's Variable Vegetable Hotpot

Right out of the oven! Smells and tastes way better than it looks here.


Friday, 16 November 2012

Easy Pork Tenderloin and Cabbage

Don't forget the apple sauce.

If you are looking for an easy to make main dish, you are in the right place. A little mustard, some dried herbs and your pork tenderloin is ready in less than an hour. While it's cooking, make some apple braised cabbage to go with it.

If you are lucky enough to have any leftover pork, build yourself some pork sandwiches. Try one with jalapeno cheese, mustard mayonnaise and crunchy romaine on some nice grainy bread. Or get out your grill pan and create a pork, apple slice and Swiss cheese panini. But first, you'll have to cook the tenderloin. And here's how.

MA’s Herbed Dijon Pork Tenderloin


Preheat oven to 350° F.

2 tbsp Dijon mustard
1 tsp dried rosemary
½ tsp dried thyme
¼ tsp peppercorns, crushed
1 lb pork tenderloin

In a bowl, mix together mustard, rosemary, thyme and peppercorns.

Ready for the oven
Spread mustard mixture over pork.

Put pork in roasting pan.

Bake about 35 to 45 minutes or until the pork is no longer pink inside. For best results, use a meat thermometer and cook pork until it registers as well done.

Cut into thin slices to serve.

Makes 3 servings.


MA’s Apple Braised Cabbage

 ½ medium cabbage, green or red
1 cooking apple
1/3 cup water
¼ cup apple cider vinegar
2 tbsp honey
salt and pepper

Cored and sliced

Remove outer leaves and core from cabbage. Slice thinly.

Peel, core and slice apple.

In a large frying pan that has a lid, combine cabbage, apple, water and vinegar. Stir and bring to a boil.

Reduce heat and cover pan. Simmer, stirring occasionally, about 45 minutes or until cabbage is tender.

Stir in honey and salt and pepper.

Cabbage-y goodness
Makes 4 servings.

Printable Recipe for MA's Apple Braised Cabbage

Thursday, 15 November 2012

Coffee Magic

I may need a new coffee maker.

A few weeks ago, maybe six, our Cuisinart grind and brew coffee maker gave up. I was a little sad to see it go. It had served us well for over seven years. We got it with Visa points so I'd never really known how expensive it was in dollars and cents. It worked well. Like magic. You put in the beans and the water and in minutes there was your pot of lovely coffee. Even if you started with ground coffee instead of beans, the coffee turned out lovely. It had a thermal carafe, too, which meant the coffee didn't keep cooking on an element. It just stayed warm until you were ready for your second cup.

Coffee Magic
When the Cuisinart gave up, my husband and I decided to be thrifty and even eco-friendly and use the coffee maker you see in the photo. Pretty retro, eh? If you were at our garage sale this summer (and not many people were), you would have seen it there for a bargain basement price of $2 and a sticker on it that said "it works". It came to us from my mother-in-law's house after she passed away. It was on her kitchen counter for as long as I'd known her and, since she was mostly a tea drinker, it never got much use.

The Proctor Silex Coffee Magic works a little differently than the Cuisinart did. There is no built-in grinder, but the operation is still dead easy. Coffee filter, ground coffee, water and press the button. (It is the only button on the machine and it lights up when the machine is turned on.) There is a "brew selector" - basically a slider on the filter basket - that gives you the option of a mild, medium or strong brew. I've tried them all. There is no difference in the coffee regardless of what brew you select. Once you start the Coffee Magic, it gurgles and sputters and makes a noise I can only describe as a ghostly whine. It also seems to be getting slower and slower. This morning as I stood listening to it struggle through its performance, I timed it. It took fifteen minutes to make six cups of coffee. That seems a little long. Stranger still, I had put in enough water for eight cups. Where did it go? Who knows. The machine is entirely encased in plastic with no place to check water levels once the water is in there. And how's the coffee taste, you ask? Meh.

Wednesday, 14 November 2012

Banana Love: Blender Banana Layer Cake with Mocha Butter Icing

Two dense, moist layers with a more-chocolate-than-coffee butter icing


Banana. Even saying it brings comfort. BA NA NA

And no wonder. For most of us it's one of the first foods our moms mashed up and spoon-fed us. It appears on the original fast food list. It smells wonderful when baked into muffins, breads and cakes. It's best friends with chocolate, plays well with cream cheese and peanut butter, and you can't make a banana split without it.

The banana has just one little shortcoming. It can go from beautiful bright yellow to spotty brown to mushy black in a few short days. Or is this only a problem in my fruit bowl?

Luckily, there are a myriad of ways to use those less than yellow bananas. For this recipe, be sure to choose bananas that are ripe. A few brown spots are okay, but if your bananas are too mushy, they won't work as well here. Fear not, more banana recipes will follow to use up these unfortunates.

I found this recipe in an old cookbook by one of my favourite chefs, Madame Jehane Benoit. Mme Benoit was an icon in Canadian cooking for many years. In the cookbook, Madame Benoit Cooks at Home, she shares some recipes from her daughter Monique including one for Blender Banana Cake. This is my version of it. If you don't care for the Mocha Butter Icing, cream cheese frosting is equally delicious.

Oh, yeah, you'll need a blender to make this.

Blender Banana Layer Cake 


Preheat oven to 350° F.
Butter two 9” round layer cake pans.


2 ½ cups flour
1 ¼ tsp baking powder
1 ¼ tsp baking soda
½ tsp salt
3 ripe bananas (about 1 ½ cups), sliced
3 large eggs
2/3 cup butter, softened
2/3 cup buttermilk or soured milk*
1 2/3 cups sugar
1 tsp vanilla

Put flour, baking powder, baking soda and salt into a mixing bowl.

Put all the remaining ingredients into the blender. Cover and blend until smooth.

Pour blender mixture over dry ingredients and stir until well mixed.

Fill each pan about half full.


Divide batter into cake pans.

Bake 30 to 35 minutes.

Cool pans on a wire rack.

Test each cake for doneness. Your tester will come out clean when cake is done. 


When cool, assemble and frost. The frosted cake will keep well in the refrigerator for several days. You can also freeze the unfrosted cakes to frost later.

* Soured milk is what to make when you don’t have buttermilk for a recipe. Basically, you take regular milk and add vinegar to it to make it curdle. In this recipe, I used slightly less than 2/3 cup of 1% milk and added about 2 tablespoons of vinegar to it. Voila, soured milk.


Printable Recipe for MA's Blender Banana Cake


Mocha Butter Icing


Icing ingredients with icing sugar divided into two quantities. Yes, that's a sifter in the lower right-hand corner. Sifting is an old-school technique that's worth it when you want a creamy, smooth icing.


½ cup butter, softened
3 cups sifted icing sugar, divided into 2 cups and 1 cup
1/3 cup sifted cocoa
2 tsp vanilla
1 tbsp cream or milk
2 tbsp brewed coffee, the stronger the better

MA’s Tip: Sifting the icing sugar and the cocoa is recommended for a smooth and creamy icing. You can mix this whole recipe up in a Kitchen Aid Stand Mixer if you are lucky enough to have one, but a hand mixer will work well, too.

Mix together cream/milk and brewed coffee and set aside.

Cream butter with 2 cups of icing sugar and cocoa.

Add vanilla and 1 cup of icing sugar to creamed mixture.

Gradually add cream/milk and coffee mixture until icing is smooth and has reached spreading consistency.

This recipe makes enough icing to fill and frost a two-layer cake or a 13” x 9” sheet cake.

Printable Recipe for MA's Mocha Butter Icing

Care to share a bite?


Monday, 12 November 2012

MA's Saucy Stir Fry

Saucy Chicken Stir Fry

Stir fries are one of my dinnertime go-tos and have been for years. I love them because once you chop things up, the rest is fast and easy. And if you start the rice about the time you start the chopping, you have a tasty home-cooked dinner in under an hour. (I will extol the virtues of rice cookers in another post.)

Stir fries are versatile, too. You can throw in any fresh vegetables you have, even bagged coleslaw, or tinned veggies like those tiny corn cobs or water chestnuts. Tomatoes are the only thing I don't add to a stir fry. They don't seem sturdy enough to take the constant stirring. And, if you use red cabbage or red onion, be warned, the finished colour is not always attractive.

This recipe has chicken breasts in it, but you can leave them out or substitute with cubed firm tofu for a vegetarian version, or use thinly sliced beef or pork instead. If you go with the beef or pork, you may want to use a beef broth instead of the chicken broth I used here.


Chicken Stir Fry

Stir frying requires you to be at the stove and stirring, so be sure to have all your ingredients ready to go before you spring into action. Cut everything into bite-sized pieces. Mix up your thickening sauce in a jar. Have the serving plates out. Then focus on stirring in the love.


3 tbsp vegetable oil
1 tbsp sesame oil
2 garlic cloves, minced
3 chicken breasts, cut into thin strips
2 onions, sliced
3 stalks celery, sliced on the bias
3 carrots, sliced
1 cup broccoli florets, coarsely cut
2 cups cauliflower, coarsely cut
1 green pepper, sliced
1/2 small cabbage, shredded
2 cups chicken broth, divided into 1 3/4 cups and 1/4 cup
2 tbsp corn starch
2 tbsp soy sauce or Bragg's liquid soy seasoning

In a large fry pan with high sides or a wok, heat oils over medium high heat. Add garlic and stir fry for one minute.


Add chicken strips to pan and stir fry until cooked through. It's impossible to use a meat thermometer to test doneness here, so take out your fattest strip and cut through the middle to see that the meat is evenly cooked. When cooked, remove chicken from pan and set aside.

Add onions, celery, carrots, broccoli and cauliflower to pan and stir fry about 5 minutes or until they're almost as soft/crunchy as you'd like them to be.

MA's Tip: If you want to speed up the stir fry process, you can steam your carrots, broccoli and cauliflower for a few minutes in the microwave before adding them to the pan.

Add the peppers and shredded cabbage (any other quick cooking vegetables you may be using, like mushrooms or green onions, can be added now, too) to the pan. Stir fry about 3 minutes more.

Return cooked chicken strips to the pan. Add 1 3/4 cup chicken broth to the pan. Cover pan and bring the liquid to a boil.

For the thickening sauce: In a small jar, combine 1/4 cup chicken broth, corn starch and soy sauce or soy seasoning.

When the pan liquid is boiling nicely, clear away the veggies and chicken from the centre of the pan and pour in the thickening sauce. Stir well to eliminate any globs of thickened sauce. The liquid will thicken to coat the vegetables in a tasty sauce.

Serve immediately. Good over rice of any kind.

If you have leftovers, try to use them up the next day. This does not keep well long-term as the veggies loose their oomph and want to become one with the sauce.

Printable Recipe for MA's Chicken Stir Fry


Going Live

Welcome. 

For the past few weeks, I have been getting ready to launch this blog. Not being a techie, It's been a learning curve and will continue to be as I get used to setting things up. 

One thing for certain, it takes a lot longer to cook when you are trying to photograph and keep notes about what you are doing as you are doing it. After cooking for so many years, the blog has already made me more aware of what I do in the kitchen. I am in awe of all the great food bloggers out there and am coming to appreciate not only their skills with food, but their talent for writing and photographing their efforts and their commitment to making the world a tastier place. I have a long, long way to go.

Before I go any farther, I want to thank my daughters and my husband: it's their encouragement and interest that has brought me this far with this project. Love you lots.

As change is the only constant, I can guarantee you will see me change things about the blog as I get used to it all. In the meantime, I welcome any and all suggestions and comments for improvement.