Pages

Saturday, 5 October 2013

Keeley's Kale and Potato Frittata

Keeley's Kale and Potato Frittata

A frittata can be described as an Italian omelette. But, there's no folding involved so it's totally easy to make. Take some eggs, some meat and/or veg and some cheese, and you've got the makings for a frittata. Hey, you may have even made one already without knowing what it was. Frittata is a delicious way to start the day, to feature at brunch, or to make a quick supper when you're really busy and really hungry.

This particular frittata is the creation of my daughter Keeley. Basically, she took what we had on hand to make this. You can easily do the same. You can add some cooked meats (ham or spicy sausage are tasty in frittatas), switch out the kale and potato for some spinach or broccoli or peppers or whatever other veggie bits you might have to use in the refrigerator, and use your favourite cheese in place of the cheddar.


Keeley’s Kale and Potato Frittata

2 tbsp olive oil
2 tsp garlic, minced
1 medium white onion, chopped
1 cup potatoes, cooked and cubed
1 bunch (about 2-3 cups) kale, washed, dried and chopped
8 eggs, lightly beaten
1 to 2 cups cheddar cheese, grated

Kale pile-up
In a large frying pan on medium heat, add olive oil, garlic and onion. Sauté until onions are softened.

Add potatoes and fry until they are warmed through. If you are using meat, add it now and cook until it also warmed through.

Add kale and sauté, stirring frequently, until it’s wilted.

Adding the eggs
Pour eggs over the vegetable mixture and stir to combine ingredients. Cover pan and let cook until eggs are almost done. You may want to lift the lid and give the eggs a stir once or twice while they are cooking. It’s not a must do, but will get things cooking a little faster and depending on your pan, it may prevent sticking.

When the eggs are almost cooked through, sprinkle on the cheese. Cover again for a few minutes until the cheese is melted.

Serve at once.

Makes 4 hearty servings.


Thursday, 3 October 2013

The Whole Beet and Nothing But the Beet


Roasted Beetroot with Sauteed Beet Greens

“…The beet is the ancient ancestor of the autumn moon, bearded, buried, all but fozzilized; the dark green sails of the grounded moon-boat stitched with veins of primordial plasma; the kite string that once connected the moon to the Earth now a muddy whisker drilling desperately for rubies.”
- Tom Robbins, Jitterbug Perfume

Tom Robbins, one of my all-time favourite writers, brings the lesson of the beet wonderfully alive in his novel Jitterbug Perfume. I love his imagination, his wordplay, and his unique appreciation of myth, humanity and vegetables. But, this is a blog for sharing recipes and not book reviews, so back to the beets.

I enjoy the whole beet and, when I am fortunate enough to get fresh whole beets, here is how I prepare them. One vegetable gives you two side dishes. Basically, the beetroots are roasted, which makes them sweeter and easier to peel, and the greens are sautéed. In the photographs here, I used both red and golden beets, because I was lucky enough to find them at a farmer’s market. Whatever their colour, beets are delicious, but I must admit having the two colours made for a more interesting plate.


Two Side Beets

Preheat oven to 350º F.

1 or 2 bunches of beets with greens (about 10-12 whole beets)
4 tbsp olive oil, divided into 2 tbsp and 2 tbsp
2 cloves garlic, minced
2 tbsp chopped onion
salt and pepper to taste
1 tbsp red wine vinegar or 2 tbsp melted butter

Slice the beet greens
Wash the roots and the greens of the beets thoroughly. Remove the greens and give them another rinse. Remove any large stems, tear the leaves or cut them into strips, and set them aside. Do not peel or cut the beetroots; leave them whole.


Toss beets in olive oil before roasting

In a baking dish or roaster, place the beetroots and toss them with 2 tbsp of olive oil. Use more olive oil, if needed, to cover all the beetroots. Cover the dish with foil and bake for 45 to 60 minutes, or until you can easily cut through the largest beet. Remove from oven and let cool slightly. If you want, you can peel the beetroots now.
Peel beets, if desired, after roasting


Beet greens cooked until tender
When the roasted beets are almost done, heat the remaining 2 tbsp of olive oil in a frying pan over medium-low heat. Add the garlic and onion and sauté for a minute or two. Add the greens. Cook, stirring frequently, until the greens are wilted and tender. Season the greens with salt and pepper.


To serve: Place the greens on a platter. Cut the beetroots into slices or wedges and arrange on the greens. Drizzle the beets with red wine vinegar or butter. Serve immediately.

Printable Recipe for Two Side Beets

Fall Back


Summer is past. Autumn is here, and I can’t believe it’s almost two months since my last post. 

During that time, I’ve been busy with many things in the kitchen – like making pickles, jams, marmalade, baking breads, and, as always, the day-to-day preparation of meals for my husband and I, and some special meals for family and friends. I have also had the pleasure of spending many enjoyable hours with my little grandson whose favourite activities currently include helping with the vacuuming, brushing his teeth, splashing around in the dog’s water bowl, and doing laps around the kitchen island while laughing wildly, preferably while being chased by his dog, his Mom, his Nana or all three. It’s all been a lot of fun.

Outside, the golden leaves are beginning to carpet the faded green lawn. The geese sound their annual farewell as they stream south together, and it’s time for me to get back to my blog. I have about a half dozen recipes ready to share with you. Hope you will be inspired to try one or two. As always, thank you for reading.

Friday, 9 August 2013

Memories of The Grill Room: Red Velvet Cake

Red Velvet Cake


Earlier this summer I had the pleasure of attending the 40th wedding anniversary of two dear friends. One of their daughters had baked the cakes for the celebration lunch: delicious banana cakes. She said she had wanted to make Red Velvet Cake for the occasion (ruby red for the 40th anniversary), but they didn’t work out for her. I told her I had a recipe for Red Velvet Cake and here it is for you, Synove, with a story to go with it, of course.
I was introduced to Red Velvet Cake when I was a kid. It was the treat at the end of many a downtown shopping trip with my nana. (Yes, we went downtown to shop, everybody did. We even took the bus.) Most of the time, we choose our coveted slice from the dessert section of Eaton’s cafeteria, but once in awhile we enjoyed the finer dining experience of Eaton's Grill Room. This recipe produces the cake that I remember.

Like many of the other recipes I share on this blog, I’ve had this one in my wooden recipe box for a long time and don’t know exactly where it originated. At one time, I made it frequently, but then got away from it. In recent years, Red Velvet Cake has enjoyed a huge resurgence in popularity. There are plenty of recipes and debate about its origin online. I read an interesting article about this cake at the Sand and Feathers blog.

This is an impressive looking scratch cake baked in three layers. I only had two 8” round baking pans available, so I used an 8” springform pan for one of the layers, and it worked just fine.

You could use a cream cheese frosting on this cake. However, the frosting recipe given here is closest to what I remember of the Eaton’s Red Velvet Cake. It calls for granulated white sugar although I have seen similar frosting recipes that use confectioners or icing sugar. It’s a little grittier in texture with the granulated, but it’s the texture I’ve come to prefer. Whichever frosting you go with, make sure you cool the cakes completely. In fact, it doesn’t hurt to refrigerate them and frost them out right out of the fridge. And, be sure to brush the crumbs off the cake before frosting, so the red stays red and the white stays white. Of course, the white frosting is a perfect canvas for decoration, but the dramatic contrast between the red and the white when you slice into the layers has always been striking enough for me.

MA’s Red Velvet Cake

Preheat oven to 350º F.

Grease and flour 3 – 8-inch round baking pans and place a sheet of parchment paper inside the bottom of each pan for easy removal of the cakes. 

Setting up to make the cakes
½ cup butter
1 ½ cups granulated sugar
2 eggs
2 oz. red food colouring
2 heaping tbsp cocoa
2 ¼ cups cake flour
1 tsp salt
1 cup buttermilk or soured milk
1 tsp vanilla
1 tsp baking soda
1 tsp vinegar

Cream the butter, sugar and eggs.
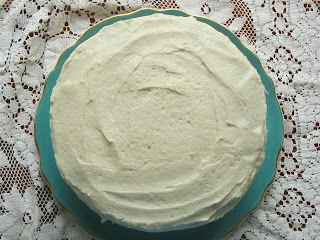
Cool completely and brush off crumbs before frosting
Make a paste of the food colouring and cocoa and add it to the creamed mixture.

Sift together the flour and salt. Add to the creamed mixture, alternating with the buttermilk.

Add vanilla.

Blend in the soda and vinegar.

Pour the batter into prepared pans.

Bake 24 to 34 minutes or until tester inserted in centre of each cake comes out clean.

Cool on rack. For further cooling and to make frosting the cake easier, cakes can be refrigerated for one to two hours.

Frost with Frosting for Red Velvet Cake.

Store frosted cake in refrigerator. Can be served cold or brought to room temperature.

Printable Recipe for MA's Red Velvet Cake

MA’s Frosting for Red Velvet Cake

Cook flour and milk until very thick

2 tbsp flour
1 cup milk
1 cup granulated sugar
1 cup butter
1 tsp vanilla

In a double boiler or in a bowl set over boiling water, cook the flour and milk, stirring constantly with lots of love, until very thick. Remove from heat and cool completely.

Cream together the sugar, butter and vanilla until very fluffy.

Add the cooled flour and milk mixture to the
Mix until frosting is consistency of whipped cream
creamed mixture and mix until well blended. The frosting will be the constituency of whipped cream.

Makes enough frosting to fill and frost the side and top of one 3-layer cake.


Delicious Red Velvet Cake


Wednesday, 7 August 2013

Keeley's Super Easy Dips


Bob's Mango Avocado Salsa - ready to stir and serve
Keeley's Four-Ingredient Guacamole - scoop and enjoy
You’ve met my daughter Keeley in my kitchen on previous occasions (she made Chocolate Pretzel Chip Cookies and Pumpkin Dog Cookies). On a recent visit with the parental unit, she treated us to these quick and simple dips. Both were delicious.

The first she calls Bob’s Mango Avocado Salsa. Bob is a student in the Foods Class at the high school where Keeley teaches. The Foods Class held an Iron Chef competition and Keeley was asked to be one of judges. This salsa was one of Keeley’s favourite entries that day. And when you try it, you’ll know why. It’s so good.

The second dip is a Four-Ingredient Guacamole. Again, very easy to put together. Keeley tells me she didn’t think she liked guacamole or even avocados until tasting some guacamole earlier this year. Now she’s a fan. Just shows how our tastes and appreciation of different foods change over time. Every now and then, it’s good to try a food you’ve previously steered away from; you might be surprised.

Cuban Oregano
Keeley brought most of the ingredients with her and thought she would find the rest in mom’s pantry. Alas, I did not have the sriracha sauce or cilantro she needed. Keeley substituted a Mexican picante chili sauce for the sriracha in the guacamole. In place of the cilantro, she used Cuban oregano, which was handily growing in my kitchen. Not truly an Origanum, Cuban oregano’s Latin name is coleus amboinicus. It is used as a culinary herb in Latin America. I got my first cuttings of it years ago at course put on by Dave Hanson of Sage Garden Herbs. The soft, succulent leaves of the Cuban oregano plant have a sweet, spicy aroma and were just the right addition to the Mango Avocado Salsa. I am so proud of the way my daughters can so easily make substitutions in, tweak and create recipes. (Hey, they're better at it than Mom, but they probably already know that, too.)


Bob’s Mango Avocado Salsa


Mango prep for salsa
3 mangoes, peeled, pitted and diced
1 avocado, peeled, pitted and diced
Juice of 1 lime
1 tsp cilantro or Cuban oregano, minced

Mix all ingredients together.

Serve at once with tortilla chips or refrigerate for up to 2 days.

This salsa can also be served as an accompaniment to grilled fish.


Keeley’s Four-Ingredient Guacamole

Avocado prep for guacamole
2 ripe avocados, peeled, pitted and mashed
1 tomato, seeded and diced
Juice of ½ lime
3 to 4 tbsp Sriracha sauce or other hot pepper sauce

Mix all ingredients together.

Serve at once with tortilla chips or refrigerate for up to 2 days.

Thursday, 1 August 2013

An Oldie but a Goodie: Sprout Burgers

Sprout Burger with Cheese
This is another one of my go-to recipes. It’s a big favorite of my husband (even though, in my opinion, he overdresses his burger as seen above with the addition of cheddar cheese). I’ve been making these burgers for decades. It originated in (guess where?) a Canadian Living magazine. It was their Summertime Cookbook Special from 1981. How do I know? Well, I still have a copy of that very issue. It was an article called “Great Menus for Good Losers: Delicious Low-Cal Suppers.” The burger was part of a menu that also featured a recipe for Yogurt Sesame Dressing to serve on mixed greens, and Lemon Snow, a dessert made from gelatin, frozen lemonade concentrate, ice cubes and egg whites. Each featured menu added up to less than 600 calories per serving.

Once you dress this burger up with cheese, mustard and relish, you’ll probably still get some of the sprout and water chestnut crunch, but you may miss the more subtle ginger-soy taste it offers and the low calorie count, of course. That’s why I dress mine with a little mayo, a leaf of lettuce and maybe a slice of tomato. However, you dress them, they are really good burgers, and a good choice to make ahead and freeze for a bbq later in the summer.


MA’s Sprout Burgers

(Originally from Canadian Living Summertime Cookbook Special 1981)
Sprout burger ingredients


1 lb lean ground beef
½ cup bean sprouts, chopped
¼ cup water chestnuts, chopped
1 tsp fresh ginger root, chopped fine
2 tsp soy sauce
fresh ground pepper

In a large bowl, combine all ingredients.
Shape into 4 large patties.
Broil or grill to desired doneness.
Serve on hamburger buns.

Our grill chef likes the burgers big and flat

Makes 4 burgers.

Wednesday, 24 July 2013

Steak with Kabob Taste

Kabob-flavoured steak served with grilled onions, quinoa and carrots


The barbecue grill gets busy this time of year. When my husband brought home a package of sirloin tip beef steaks, I remembered a marinade I wanted to try from the Canadian Living/Barbecue Collection cookbook. (Yes, the same source used for the delicious balsamic honey pork tenderloin.)

I hope you will try this marinade. The spice blend is wonderfully aromatic in a Moroccan, middle eastern way, and steaks and onions that marinate in it were oh so good. Canadian Living recommends serving this with grilled tomatoes, which would be wonderful. We had ours with the grilled onions, carrots cooked in foil packets, and quinoa, and that was wonderful, too.

MA's Kabob-flavoured Steaks

Steaks with marinade ingredients
4 beef steaks for grilling, about 8 oz each
2 onions, sliced about 1/2 inch thick
1/4 cup lemon juice
1/4 cup olive oil
2 tbsp minced garlic
1 tsp ground allspice
1/2 tsp black pepper
1/4 tsp cinnamon
1/4 tsp cayenne pepper

In a large dish, cover steaks with onion slices.

In another bowl, mix together the remaining ingredients. Pour marinade over onions and steaks, turning to coat. 
Steaks and onions on the grill

Marinate refrigerated for at least 4 hours or up to 1 day. (Ours marinated for 4 hours and the flavours developed quite well.)

Remove onions and steaks from marinade and bring to room temperature.

Grill steaks until desired doneness, turning once during grilling. Meanwhile, grill onions, turning once, until tender and lightly charred.


Printable Recipe for MA's Kabob-flavoured Steaks

Monday, 22 July 2013

The Farmers Market and Rhubarb in July


A slice of Lunar Rhubarb Cake


Rhubarb and spring go together. I don’t have a rhubarb patch of my own and didn’t manage to raid any from my patch-blessed friends this spring, so when I came across some beautiful rhubarb at a local farmers market in July, I couldn’t resist taking home a few bunches.

The Mallard as seen from Petersfield Market
The market I speak of is a recent addition in our part of the world and I highly recommend it. The vendors are friendly and the variety of offerings they bring together range from handmade bags and quilts, baked goods, funky furniture for your deck, local produce, and much, much more. You’ll find it every summer Sunday from 11 am to 3 pm in Petersfield, in the park beside the big mallard statue. I plan to return there throughout the season. Wherever you are, support your local farmers market.

But back to the rhubarb and today’s recipe for Lunar Rhubarb Cake. I love this cake. It is rich in spices, buttery, easy to make and serves a crowd. The recipe came from a Canadian Living magazine in the early 1980s. I googled it before this writing and you can still find a rhubarb cake recipe on the Canadian Living website. It’s different from the recipe I’m sharing here, but, knowing how well they test their recipes at Canadian Living, I am sure it will be good if you try it. In my Internet search, I also came across a fabulous looking rhubarb bundt cake on a canadian foodie website. The ingredients were quite similar to this recipe and it looked terrific baked up in the fancy bundt pan. Check it out. Many great recipes and ideas on this Edmonton-based website.

Why Lunar? Because the surface of the baked cake resembles craters on the moon.

Without further ado, here’s the recipe for Lunar Rhubarb Cake.


MA’s Lunar Rhubarb Cake

(Originated in Canadian Living, Summertime Special 1982)

Preheat oven to 350º F.
Butter a 9” x 13” baking pan.

All measured for the batter and the topping
Batter:
½ cup butter
1 ½ cups sugar
1 egg
1 tsp vanilla
2 cups flour
1 tsp baking soda
½ tsp salt
1 cup buttermilk or soured milk (that's a little less than 1 cup milk with 1 or 2 tbsp of vinegar or lemon juice added to curdle the milk)
2 cups rhubarb, chopped into 1” pieces
1 tbsp flour

Topping:
¼ cup butter
2 tsp cinnamon
1 cup brown sugar, packed
Rhubarb tossed with flour 


In a large mixing bowl or a KitchenAid stand mixer, cream together the butter and sugar until smooth and creamy.

Beat in egg and vanilla.

Sift together flour, baking soda and salt. Add to creamed mixture alternating with milk – making 3 dry and 2 liquid additions.

Toss rhubarb with 1 tbsp flour and mix gently into batter. This prevents the rhubarb from sticking together in the batter; helps each piece stay separate from the other.
Ready for the oven

Spoon batter into baking pan.

In a medium mixing bowl, blend together the butter, cinnamon and brown sugar. Sprinkle this topping evenly over the surface of the cake.

Bake for 45 minutes or until the cake has risen and browned and comes away from the edges of the pan.

Makes 12 to 18 pieces, depending on how large you want them.


Lunar Rhubarb Cake ready to slice


Monday, 15 July 2013

Two Open-Faces: Smoked Salmon with Feta & Bruschetta

Smoked Salmon with Feta & Bruschetta

These two open-faced sandwiches – the smoked salmon with feta and the bruschetta - are among my go-to recipes. I usually prepare them without a recipe and, once you have made them a few times, you won’t need the recipes either. But for the sake of the blog and those who are trying them for the first time, I have written my basic recipes here. Out of habit, I always make these two sandwiches to be served together. We enjoy them as a light dinner, but they also serve as appetizers - substantial appetizers.

I can’t remember the first time I made bruschetta, but it has been part of my kitchen repertoire for at least twenty years. I love its freshness, especially when the tomatoes and basil are at their peak in the summer, but any time of year, these sandwiches are so good.

It’s been many years since I first tasted the smoked salmon with feta cheese sandwiches at the Serendipity Gardens and Cafe in beautiful Rossport, Ontario. I had the pleasure of dining there only a few times when we lived in northwestern Ontario, but it was an enjoyable experience each time. My special memory of Serendipity was our twentieth wedding anniversary dinner – a surprise planned by my husband. It was very romantic, right down to the music that played while we enjoyed our meal: the owner had made a mixed tape (that’s like a play list for those too young to know cassette tapes) of tunes from the year we were married. Anyway, if you find yourself on the north shore of Lake Superior, stop at Serendipity and let me know if the smoked salmon and feta is still on the menu.

The bread used for both sandwiches is a baguette: a skinny stick of French bread. You can try other breads, but this is my preference. For the bruschetta, you can rub the slices with garlic before toasting them, but I prefer to add the garlic to the tomato mix. For the smoked salmon itself, I use whatever is available in my grocery store. The type that comes with a peppercorn seasoning is good for folks like me who are apt to sprinkle a lot of pepper on the sandwich anyway. For a change of pace, try candied salmon or even another type of smoked fish. It’s all good.

MA’s Smoked Salmon with Feta Sandwich

For the smoked salmon with feta sandwich
150 grams or 5 to 6 ounces smoked salmon (I used smoked salmon with peppercorn seasoning)

113 grams or 4 ounces feta cheese in brine – reserve 3 to 4 tsp of brine

1/8 cup chives or green onions, chopped fine

3 to 4 tsp olive oil 
          
10 slices baguette, cut on diagonal, 1 to 1 ½ inch thick

Make a creamy feta and chive topping
Drain feta, reserving 3 to 4 tsp of brine.

Mix together with love the feta, olive oil and brine until creamy. Add more oil if needed to get a creamy consistency.

Add chives to cheese mixture and stir until combined.

Spread cheese mixture on baguette slices.

Top with smoked salmon
Top each slice with pieces of smoked salmon.

Serve immediately.
           
Makes ten open face sandwiches.


MA’s Bruschetta 

Preheat oven to 450º F.
Cover baking sheet with parchment paper or foil to ease clean up.

For the bruschetta
4 tomatoes, chopped

¼ cup fresh basil, minced

1 tbsp fresh oregano, minced

1/8 cup fresh flat leaf Italian parsley, minced

1 to 2 tsp garlic, minced

2 tbsp grated Parmesan cheese

2 tbsp grated mozzarella cheese

Tomato mixture on toasted baguette slices
20 to 24 slices of baguette, white or whole wheat, cut on diagonal, 1 to 1 ½ inch thick

2 to 3 tbsp olive oil

In a bowl, mix together with love the tomatoes, basil, oregano, parsley, garlic, Parmesan and mozzarella. Set aside.

Note: This bruschetta mixture can be made up to a day ahead and refrigerated. Just before serving, take the mixture out of the refrigerator and bring it to room temperature. Drain away any excess liquid from mixture before putting it on the toasted baguette.

Place baguette slices on baking sheet. Brush with olive oil. Bake 3 to 4 minutes or until the slices are toasty and lightly browned.

Put a tablespoon or two of bruschetta mix on top of each piece of toasted baguette.

Serve immediately.

Makes 20 to 24 open faced sandwiches.


Tuesday, 9 July 2013

My Boyfriend's Birthday Cake

Crispy Rice Layer Cake
Don’t get the wrong idea, folks. This boyfriend-girlfriend relationship is all above board, spouse approved, and largely based on cake - specifically crispy rice cake. When I know my friend needs a little cheering up or most of the time for no special reason, I make him a crispy rice cake.

For his birthday, it was only natural to forgo the usual sheet cake and make him a crispy rice layer cake. It's super easy, quick to make and you won't even heat up the oven. If you want to make one for your boyfriend, here's how.

MA's Crispy Rice Layer Cake

Butter 2 springform pans.

4 tbsp butter
1 package (10 oz) regular marshmallows or 4 cups miniature marshmallows
7 cups crispy rice cereal
1 to 1 ½ cups frosting of your choice

Mixture cooling in springform pans
In a large, microwavable bowl, heat butter and marshmallows on high for 3 minutes, stirring after 2 minutes. If things have not melted down after 3 minutes, microwave in 15 or 20 second intervals, stirring after each, until the mixture is smooth.

Add crispy rice cereal to butter and marshmallow mixture. Stir until all the cereal is well coated. A well-buttered spatula makes stirring easier.

Divide mixture in half and put each half into one pan. Press mixture into pan using the buttered spatula, wax paper or buttered fingers if the mixture is cool enough.


Crispy and good with chocolate frosting!
Leave in pans for 10-15 minutes. Then remove from pans and place onto rack covered with wax paper to dry completely, about an hour.

Place one cake on serving plate and cover top with frosting. Place second cake on top and cover top with frosting. You can cover the sides of the cake if you wish, but I like the look of the cereal cakes.

Serves 8 to 10.


Saturday, 6 July 2013

Two for the Grill

Balsamic Honey Tenderloin

How does a barbecue meal come together at your house? Around here, it takes two. I do the prep in the kitchen and my husband handles the grilling. It works well for us except that over the years we’ve become so used to our roles that neither of us is really comfortable with switching over (plus I am not a big fan of fire of any kind, so our system is okay with me.)

Last weekend we two had a lovely meal out on the deck. We enjoyed balsamic honey tenderloin, potato and onion packets and coleslaw. The tenderloin recipe came from Canadian Living/The Barbecue Collection: a really big cookbook full of recipes you’ll want to try. The recipe said we’d have a delicious crust on the meat, but that didn’t happen. However, it was so tasty and so melt-in-your-mouth good that we didn’t miss the crust. The leftover pork was equally good the next day. The potato and onion packets are something we’ve been making for years (and you probably have your own version of it, too) so I thought it was a good idea to write it down somewhere. For convenience, I used bagged coleslaw and tossed it with bottled coleslaw dressing and a few little extras to make it my own (think celery seeds, caraway seeds, a teaspoon of sugar and maybe some extra mayo).

MA’s Balsamic Honey Tenderloin

from Canadian Living/The Barbecue Collection Cookbook

Pork skinned and marinade mixed
2 pork tenderloins, about 12 oz each
2 tbsp liquid honey
2 tbsp grainy mustard
2 tbsp balsamic vinegar
1 tbsp olive oil
1 clove garlic, minced
¼ tsp salt
¼ tsp pepper

Remove any silverskin (connective tissue) from the pork.

Mix together honey, mustard, vinegar, oil, garlic, salt and pepper.

Brush with marinade and turn occasionally
Put the pork in a non-metal dish and pour marinade over it. Turn the meat to coat. Marinate for 20 minutes or, refrigerated, for up to 1 day. (We marinated ours for about 8 hours.)

Remove pork from marinade, reserving the marinade to brush on as a glaze as the meat grills.

Place pork on greased grill over medium-high heat. Brush with marinade. Grill, covered, turning occasionally, until just a hint of pink remains in centre (about 160º F), about 18 minutes.


Sliced and ready to enjoy

Transfer meat to cutting board; tent with foil and let rest for about five minutes before slicing.

Makes 4 to 6 servings.


MA’s Grilled Potato and Onion Packets
Potato and onion with seasonings
3 Russet potatoes, sliced thinly - almost, but not quite through, to the bottom of the potato

1 white onion, thinly sliced

olive oil

sea salt or seasoning salt (I used a roasted garlic and sea salt seasoning)

pepper (I used freshly ground red, white and black pepper)

Cut heavy-duty aluminum foil or two layers of regular foil into 3 - 12” squares (or larger pieces if needed to accommodate the potatoes).
The packet

On each piece of foil, place a sliced potato. Put slices of onion between each slice of potato. Spray or drizzle a little olive oil over the potato and onions. Sprinkle with salt and pepper. Repeat with other two potatoes and remainder of onion slices.

Wrap foil around the potato and onion to make a packet.

Place the packets on the grill over medium high heat. Cover and cook for 30 to 40 minutes, turning once or twice as they cook.


Grilled to perfection!

Remove packets from grill and open carefully. After all, it is a hot potato in there. Turn out into serving dish. Hungrier folk may wish to have a whole packet to themselves and that’s okay, too.